Medium-scale Computations
Overview
The notebook for this example runs medium-scale computations on a notebook instance in GCP Vertex AI Workbench using XArray and Dask.
Step 1: Create a notebook environment in Vertex AI
Follow the steps in the GCP documentation to create a user-managed notebook instance within Vertex AI Workbench.
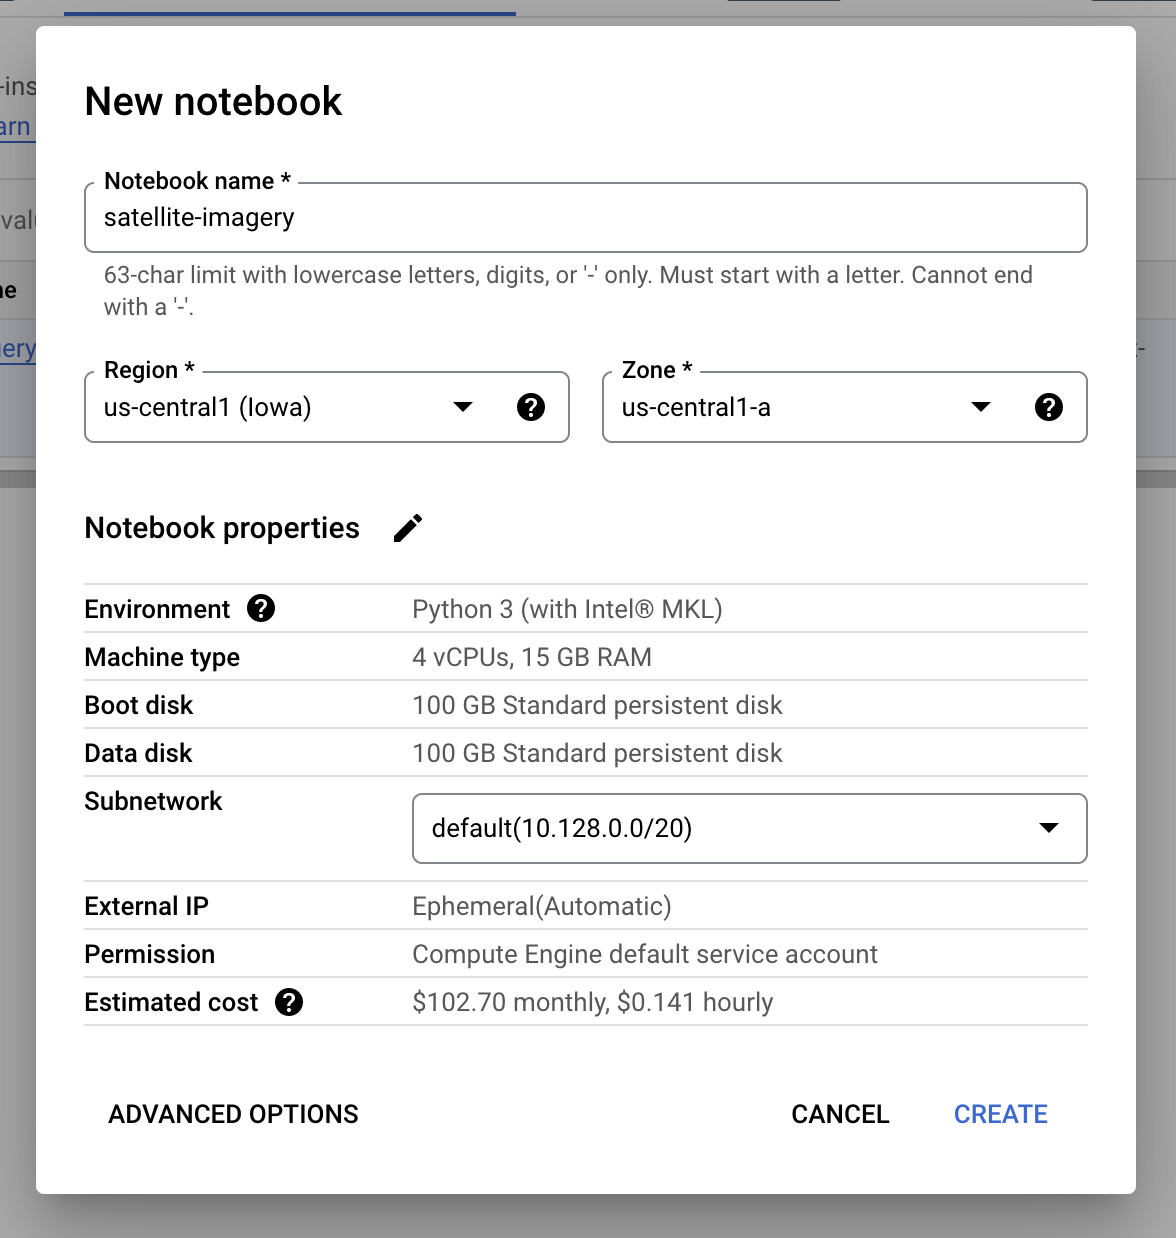
From the Google Cloud Console, navigate to Vertex AI > Workbench, then click
on New Notebook in the User-managed Notebooks tab. For this example you can
select the Python 3 environment, give your notebook a name, and select your
desired region and zone.
You can click on the Create button to create your notebook, or you can
customize your machine type and other settings by clicking on the
Advanced Options button.
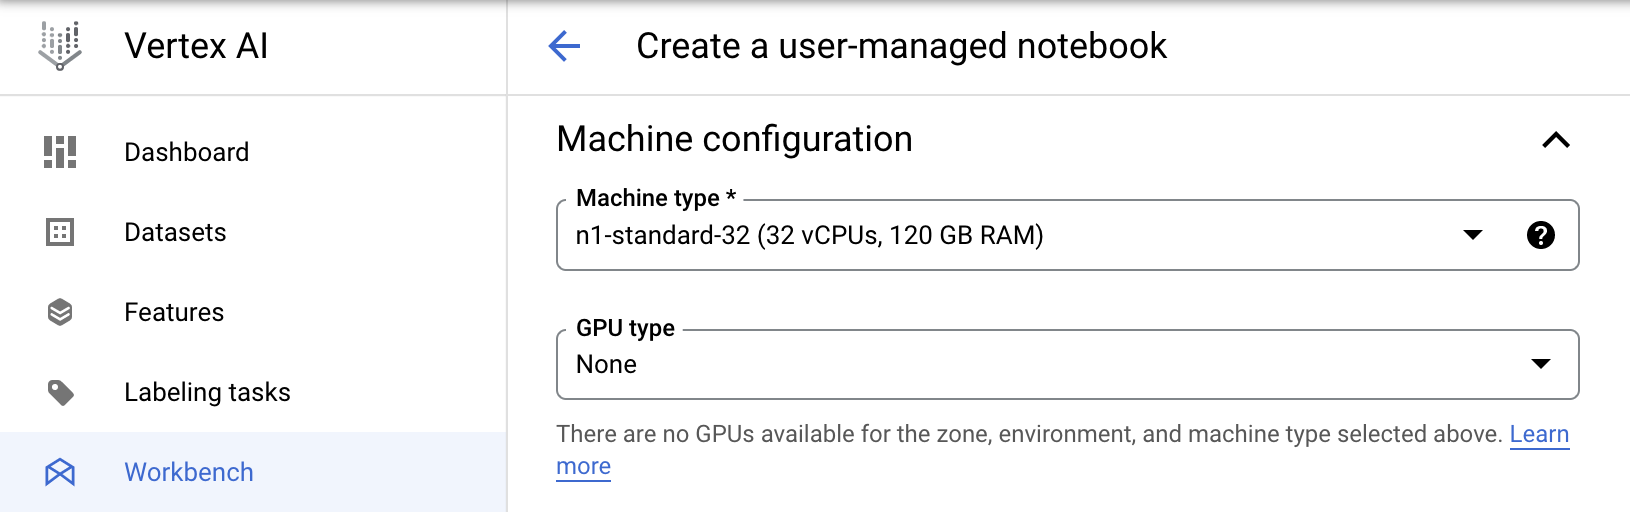
For this example, we'll use a n1-standard-32 notebook instance that has 32
vCPUs and 120 GB RAM by setting the following machine configuration in the
Advanced Options page:
Once the notebook instance is running, click on the Open JupyterLab button to
view the notebook environment in your browser.
Step 2: Create a new Python environment and notebook kernel
From within the notebook environment, open a new terminal window and create a conda environment with Python 3.8:
conda create -n py38 python=3.8
Activate the newly created environment:
conda activate py38
Install and register a notebook kernel for this environment.
conda install ipykernel
Step 3: Clone the repository
Clone the repository with these examples by running the following command:
git clone https://github.com/koverholt/scaling-python-on-gcp
Step 4: Install dependencies
Change to the scaling-python-on-gcp directory by running:
cd scaling-python-on-gcp
Install the Python packages in this repository by running:
pip install -r requirements.txt
Step 5: Run the medium-scale notebook
Open the notebook located at
scaling-python-on-gcp/2-medium-scale/satellite-imagery.ipynb for this
medium-scale computation, which contains all of the remaining code that you need
to run for this example.
Be sure to switch to the notebook kernel for the py38 conda environment that
you created earlier.
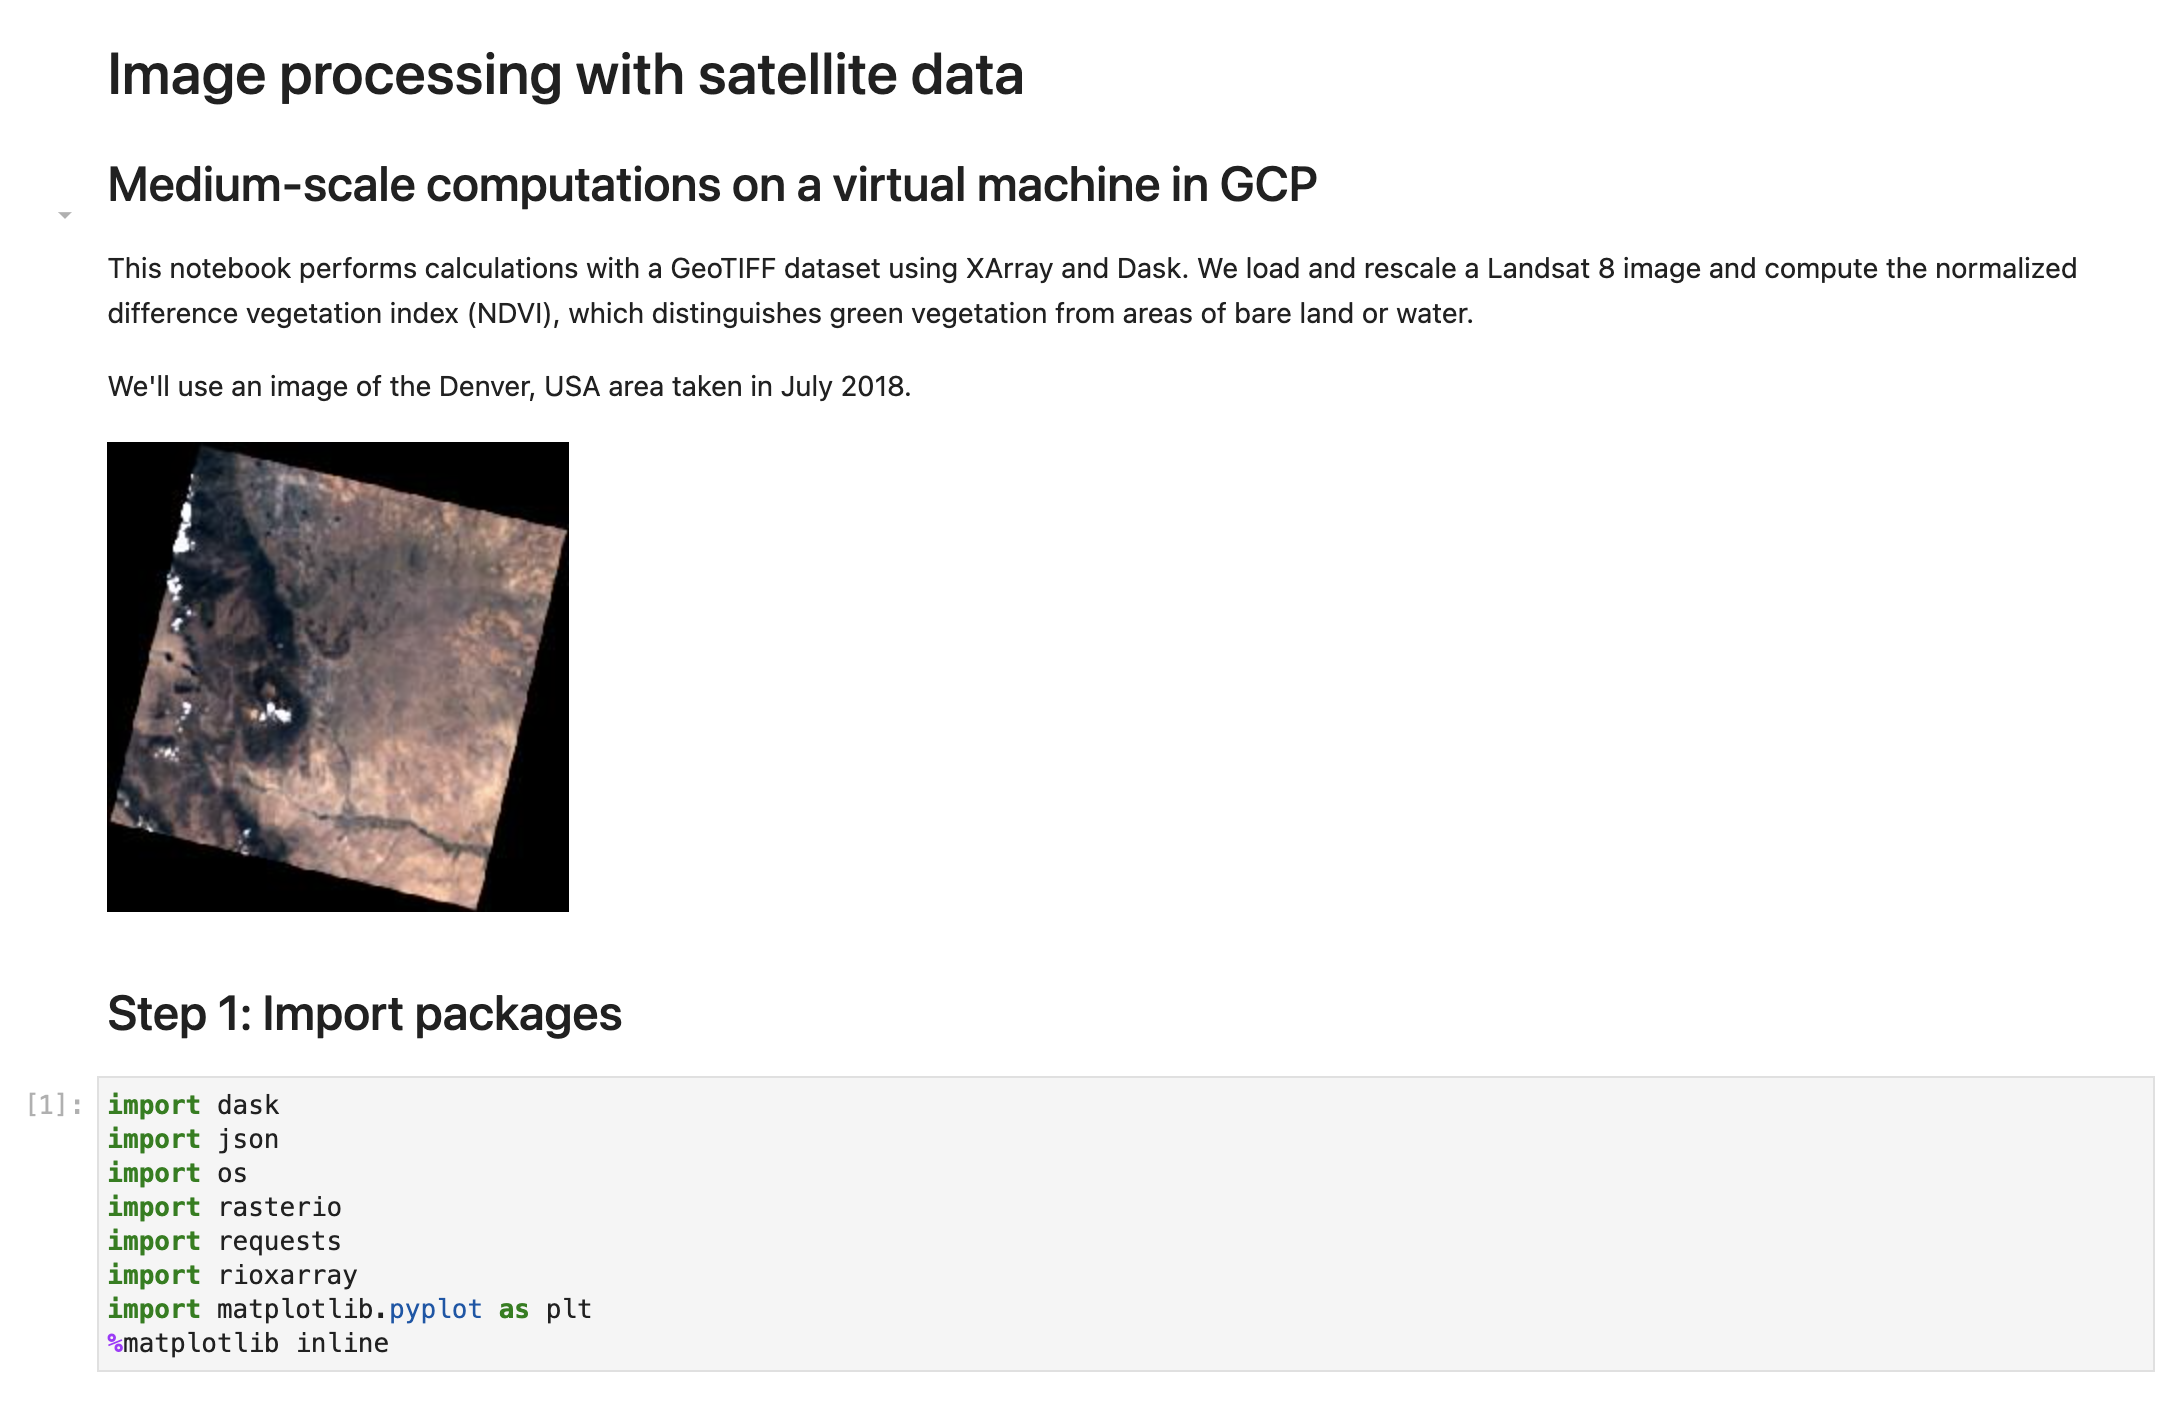
Run through all of the notebook cells to point to the satellite image data, start a local Dask cluster on your machine, and compute and visualize the NDVI.
Success!
Congratulations! 🎉 You've successfully run the medium-scale computation example and calculated the normalized difference vegetation index (NDVI) on 30 satellite images from a notebook instance within GCP Vertex AI Workbench.